The Europe Itinerary Part 1

It was a quick decision made to visit Europe during autumn 2009. The AirAsia promotional airfare (during Oct 08) from KUL – STN was so attractive that I’ve made the booking immediately! That leave me roughly 11 months to plan and prepare for the trip. It was just a 8 days trip, and I have decided to go to 3 specific places (and countries) on backpack! The first thing to plan your itinerary: (1) Lock down your destination(s).

I’ve been studying and working in London for 3 years, hence staying longer in the UK was not my plan. I would just estimate my stay in London for 2 days (6 days left). My next preferred destination was Interlaken, and of course Jungfraujoch (pronounced as Yong-Frau-York) in Switzerland. This was the place I have missed out from my last visit to Switzerland 5 years ago, and I’m definitely heading to the Alps this time! Last but not least, Paris is a romantic destination you cannot miss if you are travelling with your partner.

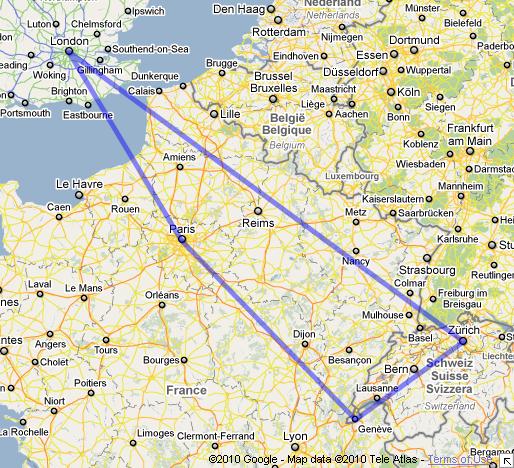
Once you have picked your destinations, (2) draft your travel route in a map, it’s as easy as joining the dots! Google Map offer a good way to start. Plotting your travel route in a map will let you have a general idea of where you will be going, and it also let your friends and family know your whereabouts during the trip. Below is my travel map.

If you have noticed, Interlaken is not plotted in the map. Sometimes, the place you wanted to go may not have airport for you to reach there. The nearest airport is either Berne, Zurich or Geneva; and perfectly, Interlaken was situated in between these Swiss city! I have decided to fly to Zurich and head south towards Interlaken and Geneva.

Interlaken is the entry point for most visitors to Jungfraujoch – the top of Europe, I did some homework to find out the local attractions and tour packages. Most tour suggested that Jungfraujoch is a full day excursion, that would make my stay for at least 2 nights in Interlaken (3 days left).

My next focused destination is Paris, France. From Interlaken to Paris, I found out we have 2 possible routes: Berne-Paris via train or Geneva-Paris via flight (or train). Travel via rail is obviously cheaper than flight, but it takes longer time, often 1-2 hours more. Besides that, I have to check the timetable for the best possible schedule according to my itinerary.

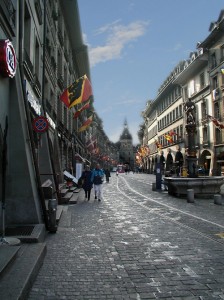
My initial plan does not include Berne as a travel point. Now I have to find out what I can do in Berne versus Geneva, and then decide where I should depart from Switzerland to France.  I have been to Berne in my previous trip, it’s the capital of Switzerland, a beautiful medieval town with cobblestone streets. Geneva on the other hand, has a diverse history dating back to the Protestant Reformation. Situated along the banks of Lake Geneva at the foot of the Alps, Geneva is a paradise for landscape photographers!
Click to Enlarge

While I have no decision yet whether to depart from Berne or Geneva, let’s continue my planning on Paris. I would like to know what attractions we have in Paris, google search result returns with tons of places to visit in Paris. Estimate stay for 2 nights in Paris (0 days left).

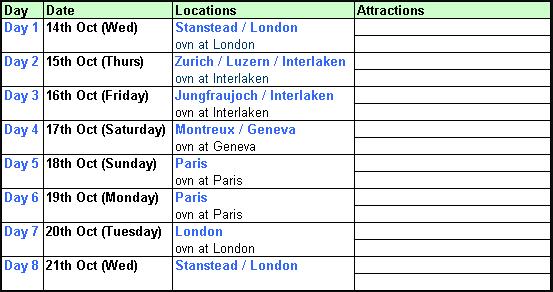
Below is my drafted itinerary so far. Continue with Part 2.
Travel to Europe via AirAsia

This post is meant to provide a guide to Malaysian travelers to Europe via AirAsia. Take note that at the time of this writing, AirAsia do not have direct flights to other European countries yet. You have to transit via London. Let’s take a look on the flight schedules* to London Stansted (STN) from Kuala Lumpur (KUL).

Outgoing Flights Schedule *As of 1st Feb 2010
D7 2008 1230 (KUL) – 1930 (STN)
  1510 (KUL) – 2210 (STN)
  0900 (KUL) – 1600 (STN)
D7 2006 2200 (KUL) – 0500 (STN)

At a glance, we knew that all 3 flights on D7 2008 will arrive at London in the evening, and it would be too late to transit to another European countries. Even if you can make it, your arrival to your destination will be midnight already. Trust me, you don’t want to ruin your holiday catching a late night train or knocking at a guest house/hostel.

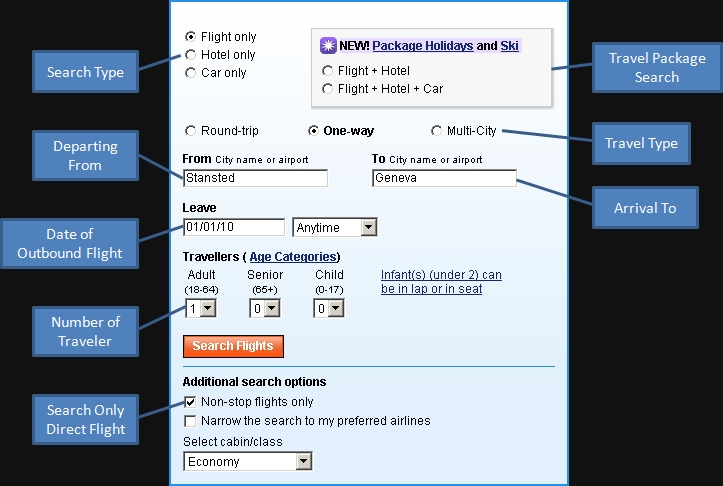
On the other hand, I will recommend you to take the D7 2006 flight, which will arrive at London in the morning (next day). At this time, you would have plenty of options to transit to your destination (earlier too). Need help finding transit flights? I used eBookers to search, book and pay for my transit Europe airfares, particularly for London outbound.

When searching for transit flight, take note that London outbound flights will have several options, it might either from London Stansted, London Luton, London Gatwick, London City Airport, or London Heathrow. You must allocate time for your travel between airports, check-in, immigration and custom, etc.

Approximate Distance of London Airports to London City Center

My advise for airfare, book earlier to get cheaper price and avoid disappointment. If you can’t find any available, probably the fare has not been publish yet. This is common to budget airlines in Europe. I usually booked mine 1-2 months ahead of schedule. For non-budget airlines like British Airways, you can usually book and pay for the airfare 2-3 months ahead, if you have confirmed your itinerary.

DPP Quick Tip: Clone versus Patch

Working with photo editing software has become a pre-requisite for most if not all digital photographers. Unlike film photography, there is little chance that you can touch up an image that has been exposed on the film. Therefore, ensuring a correct exposure and composition before you click on the shutter button, is very important. Does this matter to digital photographers? The answer is Yes!

Many photographers nowadays had the wrong impression that digital post-processing (DPP) will “fix” or “make” your photograph better. However, capturing a picture with a perfectly balanced exposure and a stunning composition, is the very first step that you need to practice as a photographer. DPP is only used to drop the final touch on my photograph to make it perfect.

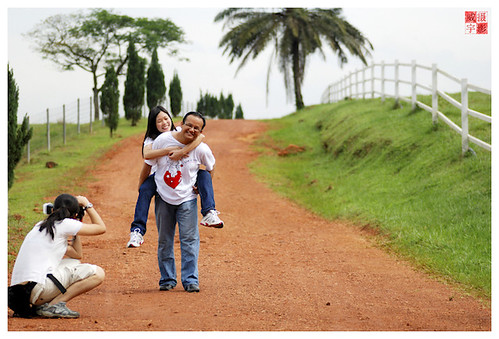
There are circumstances however, that DPP was used to fix (or fake) a good photograph. The tip that I am going to show you is particularly useful when you need to work with several photographers at the same time. There are inconveniences when these photographers are using different focal-length lenses during the shooting session. Take for example the below photograph; I’m shooting with a tele-lens while my partner is shooting with a wide lens.

Before Patch

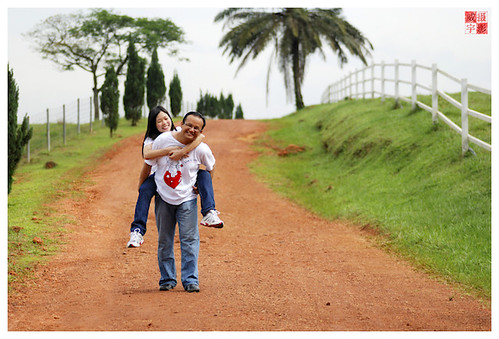
There are nothing wrong with the subject. Infact I like the natural expression of the couple. The problem is my partner was captured in the frame :) This can be resolve simply by patching. Patching here means copy a section of an image from another photograph, and paste it on top of the current photograph. To ensure the end result “looks” real, consider copy with feather mode so that the edge of the copied image blended with your current photograph.

After Patch

What I will do next is to remove distractive elements on my photograph. Two things you can do here. First is to crop your image tighter to remove “unwanted” objects at the side of your photograph. Second is to “clean” your image with a clone brush (Most photo editing software should have this function). Cloning means making identical copies of a portion (normally small area) of your current image, and paste it on “unwanted” objects.

Editing and Cloning

Feel free to comment on the final edited image above. Personally I will retain the background tree for overall balance of the image. However, removing the tree might also makes the image looks “cleaner”. What you think?

PWP Darren & Mei Ling

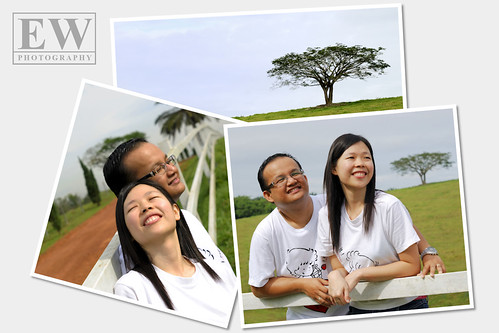
This is the first series of Pre-Wedding Photography (PWP) for Darren & Mei Ling. There were not much preparation as it was meant to be a casual outing + photo shooting session. The general plan for the day are separated into 3 places: morning @ UPM, afternoon @ Putrajaya, and evening @ Tanjung Sepat. We have 4 photographers (including myself) and 1 assistant joining the shooting. The weather was very promising in the morning, but turned overcast after noon. Below is a teaser shot for the event.

Teaser Shots

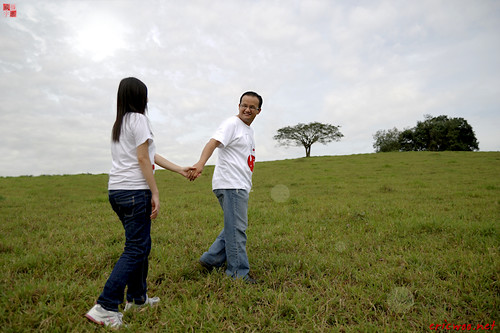
I quite like this shot taken at UPM, when I asked Darren & Mei Ling to hold hands and walk up the hill. The focus is on Darren’s face with fill-in flash. Several shots have been taken at this spot, and the best was chosen. The sun glare was a DPP job.

ISO 100 | 1/1600 | F2.8 @ 17mm

This shot was taken at Putrajaya Lake. Simple and clean, just one take.

ISO 200 | 1/2000 | F2.8 @ 90mm

Here’s my favourite shot from Tanjung Sepat. Again, I have asked the couple to walk hand in hand towards me, and I shoot this from low angle. I have taken several shots initially but not satisfied. I’ve switched shooting from different position and try to find a better composition. The bonus to this shot was the dramatic skies of the golden hours! The cons is sacrifying the shadow without using a fill-in flash, but I have pushed up a bit of the shadow by DPP. Other photos in the set can be find here.

ISO320 | 1/80 | F2.8 @ 32mm

Happy New Year 2010

It’s a rare opportunity to shoot fireworks from within Petronas Twin Towers, and I have chosen this very moment (New Year Eve) to do so. You may wonder why, but my answer(s) are quite simple:

  1. I have never try that before, and I wonder how it may turn out
  2. I have the privilege to access the Twin Tower, because my office is there
  3. I will soon not have the privilege to access the Twin Tower, because…you will know later :)

So I am now sitting in my office waiting for the New Year countdown, it’s a good time to do a quick study on how to capture fantastic fireworks shot. I know I definitely need a tripod. Next I gotta choose a nice spot, some place dark enough to avoid unwanted glare light from the environment, and that’s done. Last but not least are all the “recommended” camera settings, and I’m ready to go!

Happy New Year 2010 to all my readers, let’s see how my firework shots turn out tonight.

… After 2 hours shooting… and 2 hours of editing… here’s the result.

00:00:05 First Blast of 2010

00:00:10 First Blast Goes Off

00:01:24 Homing Missles Blast Off

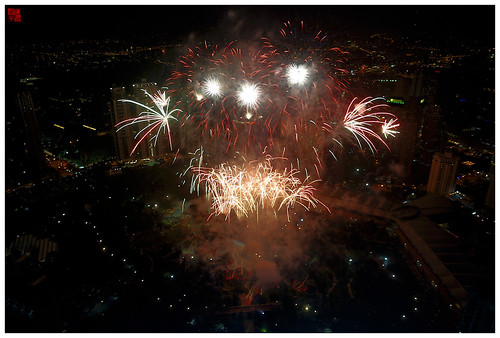
00:01:59 Three Eyes Monster

00:02:38 Violet Rain

00:03:15 My Favourite Blast

There are more photos at here. All shots above are taken on a tripod, preset to manual focus. ISO 100, AWB and bulb mode (average 3 seconds) using aperture f/8 – f/13. Post processing using Nikon Capture NX2 and Corel Paint Shop Pro.